Rosetta Workspace 
In Rosetta, a Workspace is a user area that allows the user to work with a model in a "safe space". It contains a copy of all the model files for the user to edit and test within their own area. The Workspace Manager provides access to all the operations the user requires to manager their Workspaces.
In this section, you will learn about:
- General principles: No Workspace here...
- What is a Workspace?
- Workspace Manager
- Source control integration
General principles: No Workspace here... 
Rosetta is a cloud-native application. This means that the Workspace exists not in the user's local browser but on a remote server and simply rendered in their browser window. In particular, the model files are not stored anywhere on the user's desktop and the user does not need to manage how these files are organised, nor configure dependencies, etc.
Similarly, there is no concept of "saving" a Workspace in Rosetta: as the user makes changes, the state of the Workspace evolves and the latest state gets automatically persisted on the server.
This cloud-based paradigm drives much of how the application behaves from the user's perspective.
What is a Workspace? 
A user can create a Workspace as an environment that hosts an editable model which can be amended and contributed. Such an editable model is called a Read-Write model. A Workspace is typically designed around a unit of work that the user wants to carry-out, and thus is named accordingly.
Every Rosetta user manages its own set of private Workspaces. A user may have multiple Workspaces but they can only activate and use a single Workspace at any point in time. The active Workspace is loaded on the server that the user's browser is connected to.
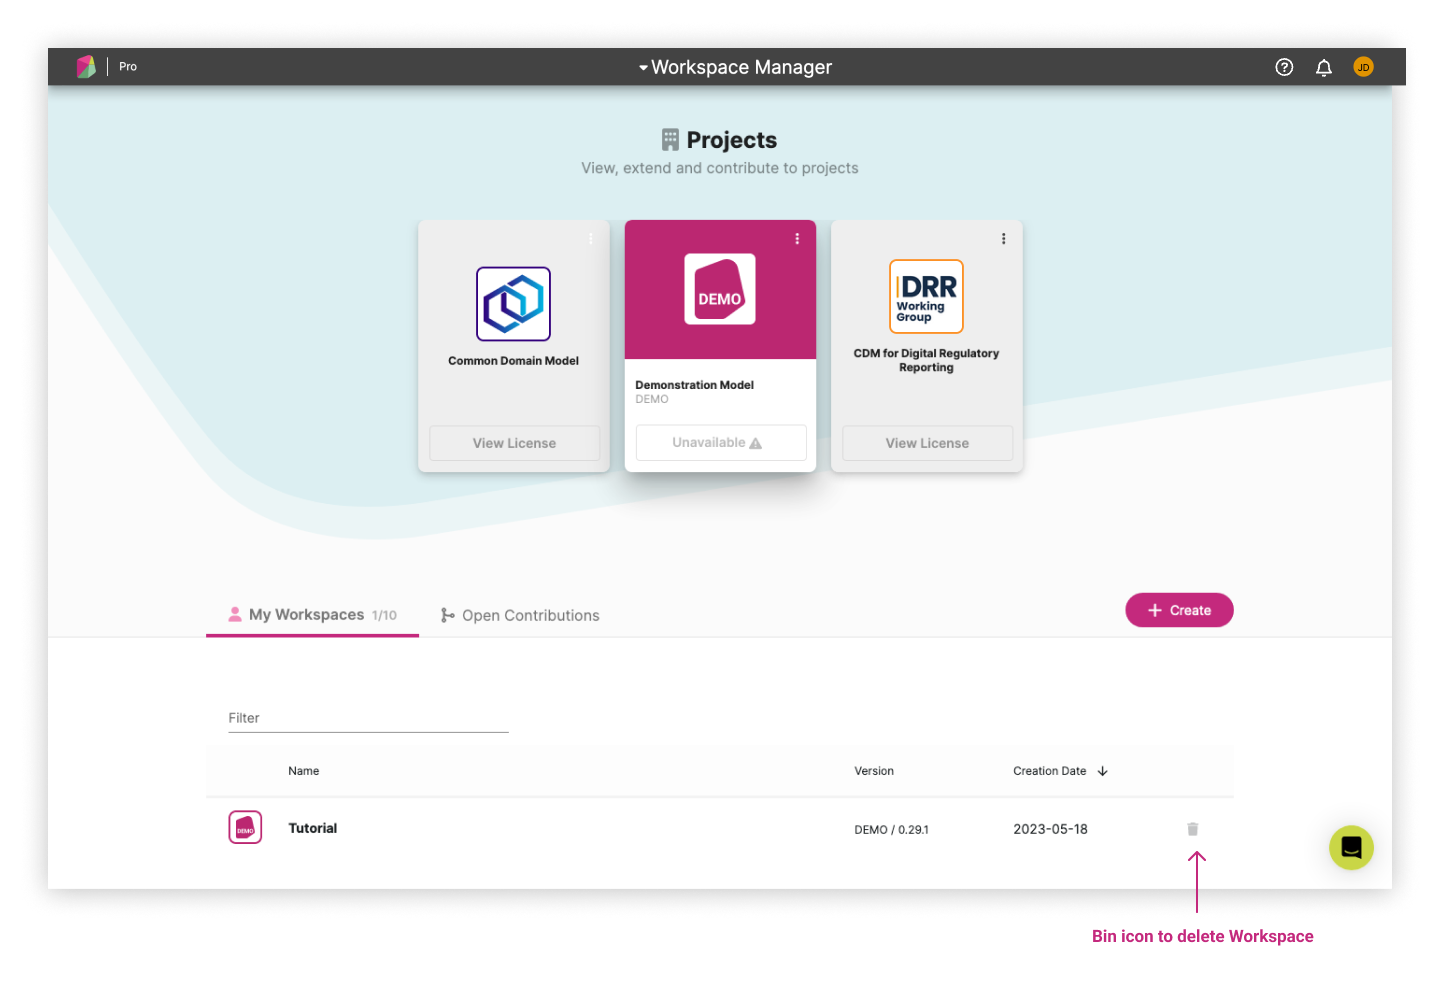
The list of created Workspaces appears in the My Workspaces section. From this space, the user can view or delete any Workspace present in the list.
Workspace Manager 
The Workspace Manager provides access to all the operations the user requires to manager their Workspaces. It provides access to existing standard read-only models, allows the user to create their own models and to switch between existing models and to perform other actions such as downloading and deleting models.
Accessing the Workspace Manager 
When a user loads the Rosetta Application for the first time, they will be directed to a Workspaces page, where they will be requested to choose which of the standard Read-Only models, called Projects, they wish to use. At this point, the user will have to accept the License Terms of the selected Project. Then, the user will get access to a Workspace.
Alternatively a user can create a Read-Write Workspace from one of the standard projects. Before being able to create a Workspace the user must accept the License Terms for the selected Project.
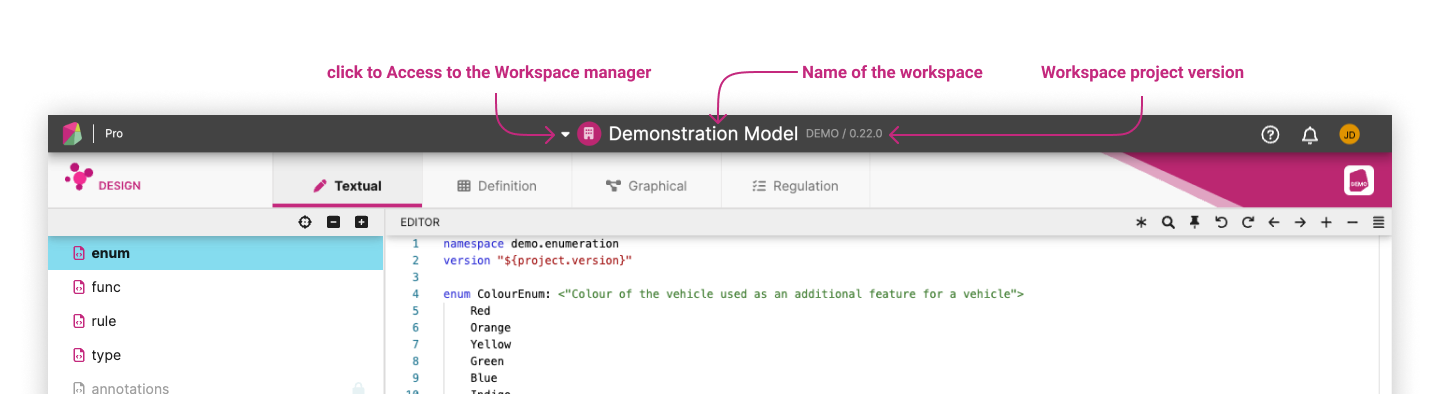
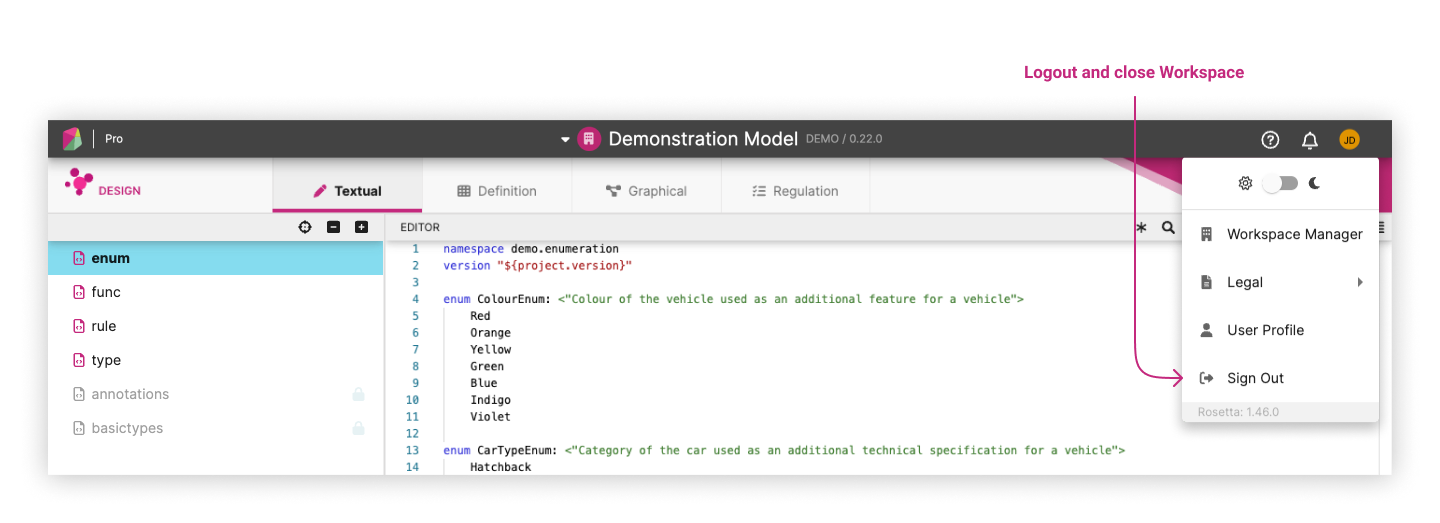
When subsequently logging back, the user will be directed straight to the last in use Workspace. The Workspace Manager is accessible via the Workspace name button at the top of the Application window and then the Go TO Workspace Manager button at the bottom of the dropdown. This shows the current Workspace name.
Workspace version status 
When you create a workspace, it is based on a specific version of a project. The workspace displays a status indicator (called a “project chip”) to help you understand the current state of your version:
Version Statuses:
- Up to date - You are using the latest available version for your major release. No action is needed.
- Upgrade available - A newer minor version is available that you can upgrade to. This allows you to benefit from the latest improvements while keeping your existing work.
- Unsupported - The version you are using is no longer supported and cannot be accessed. If you need to continue working with this version, please contact support.
End of Life Support:
All versions remain supported for 6 months after their release. When a version is nearing the end of its support period:
- The version number will appear with a strikethrough
- Hovering over the version displays the date when it will become unsupported
Major Version Updates:
When a major version reaches end of life, you will not see an “Upgrade available” status. Major version migrations require manual intervention because they may involve significant changes that need to be reviewed and adapted in your workspace.
Opening and switching between Workspaces 
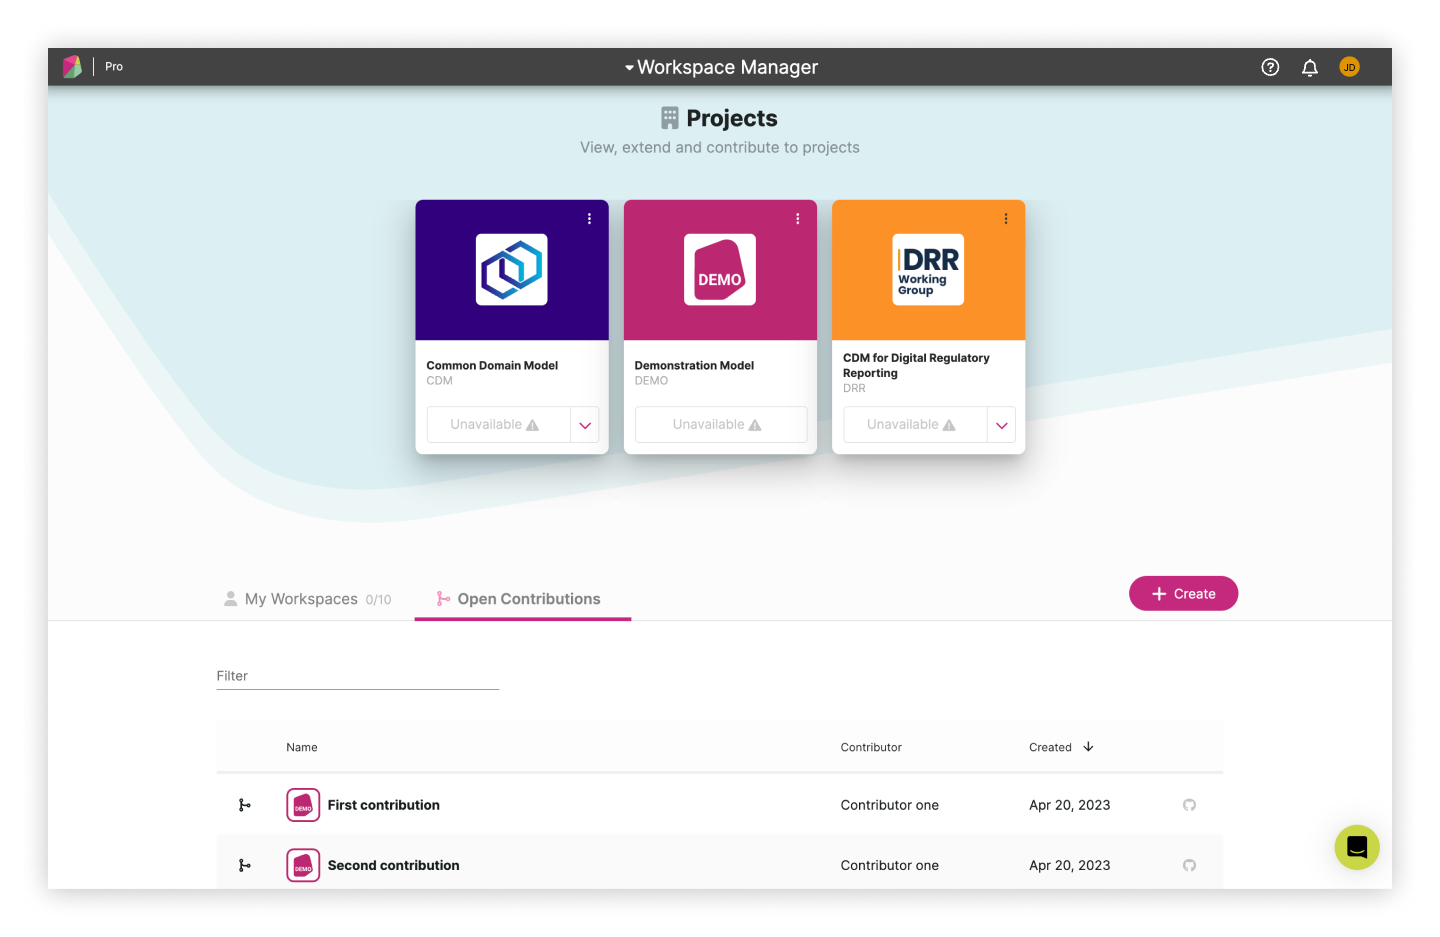
In the Workspace Manager, the user has access to a list of currently available Workspaces and Projects, and can select which one to open.
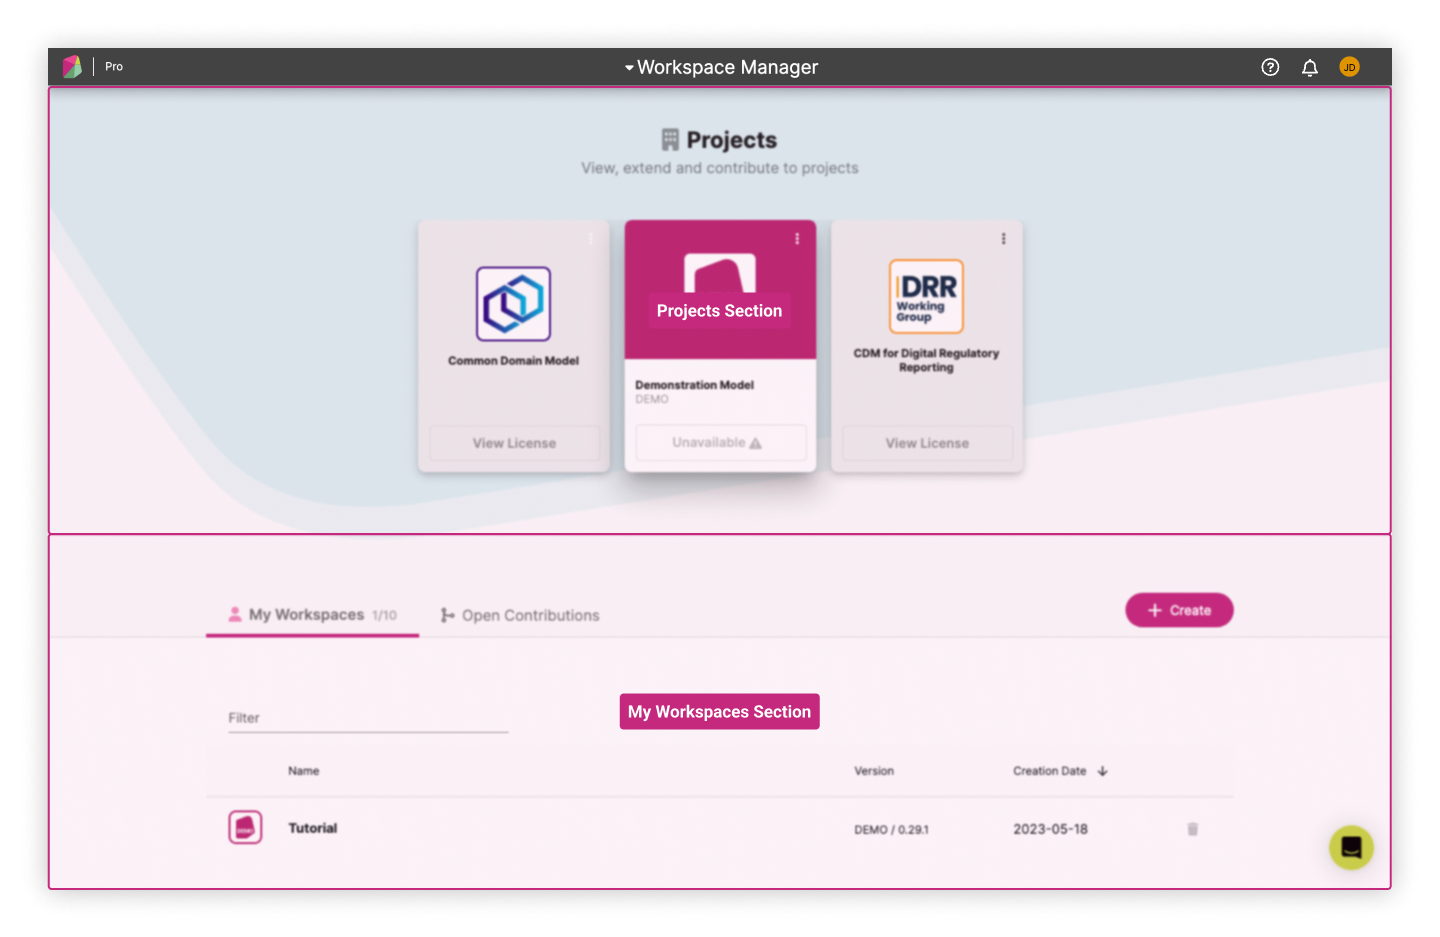
Projects 
Under the Projects section, the user has access to a list of Read-Only models. A Project is defined as an industry standard project that is owned by an identified organisation (e.g. ISDA Common Domain Model, owned by ISDA)
Workspaces 
The user can create a Workspace from a list of Read-Only models. The list of created Workspaces appears under My Workspaces section. From this space, the user can view or delete any Workspace present in the list.
When the user selects a different Workspace (in our example: we switch from Demonstration Model to Tutorial), the Application closes the current Workspace (in our example: shown as Demonstration Model) and opens the new one. This process typically takes a few moments as a number of server-side operations are required in the background.
Once its name gets displayed in the Workspace Menu, the new Workspace has been loaded as per its last persisted state and the Application operates in that Workspace from now on.

Creating a Workspace 
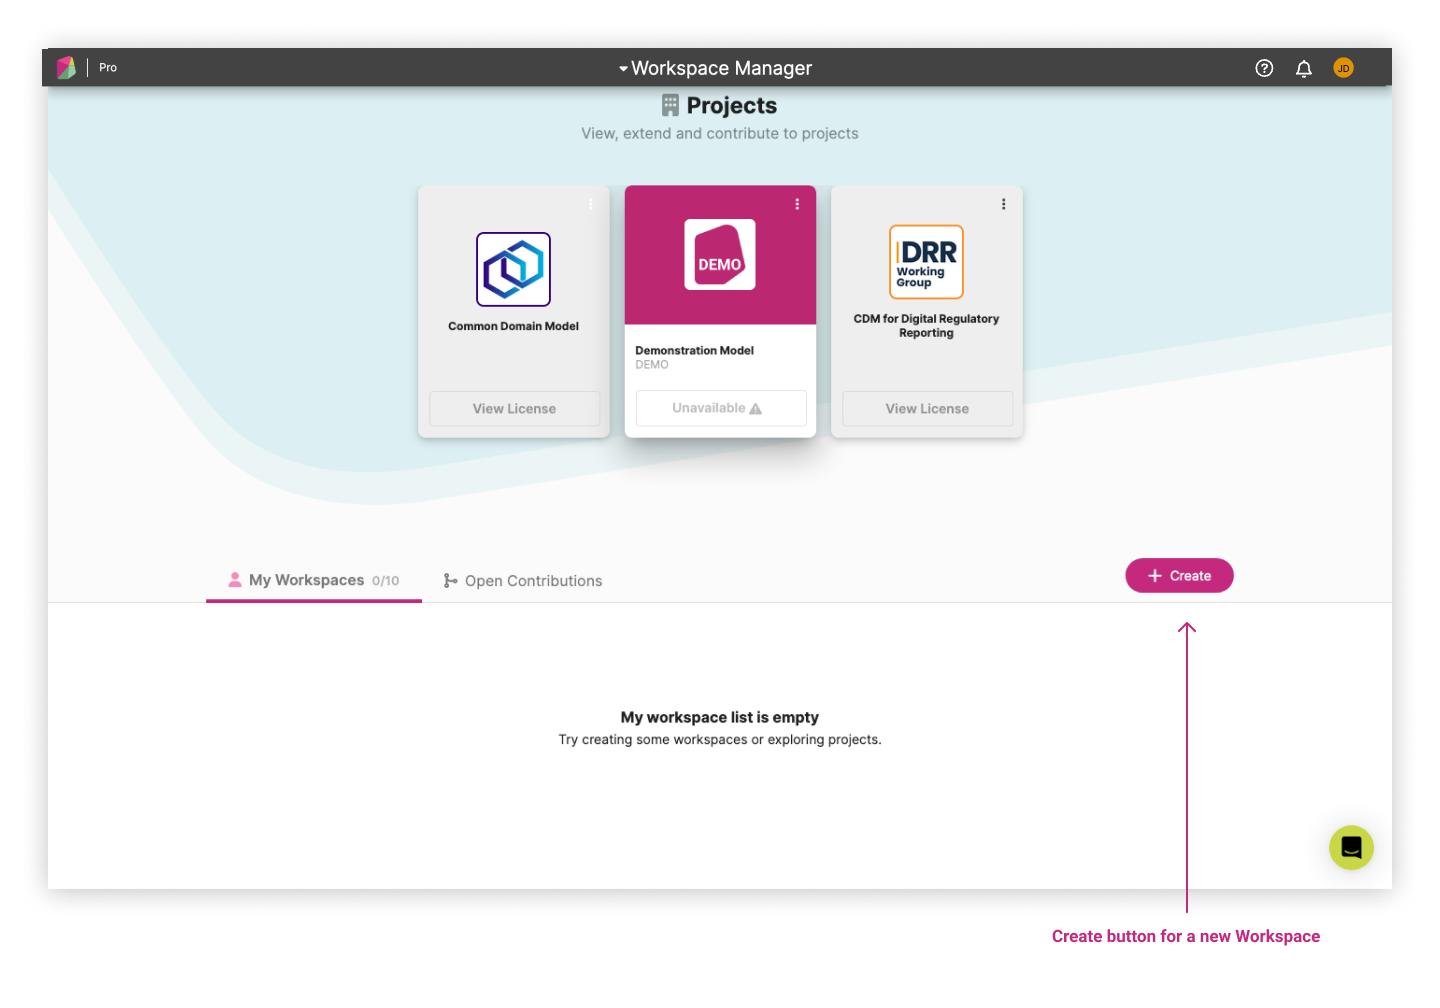
To create a new Workspace, the user can select the Create button:
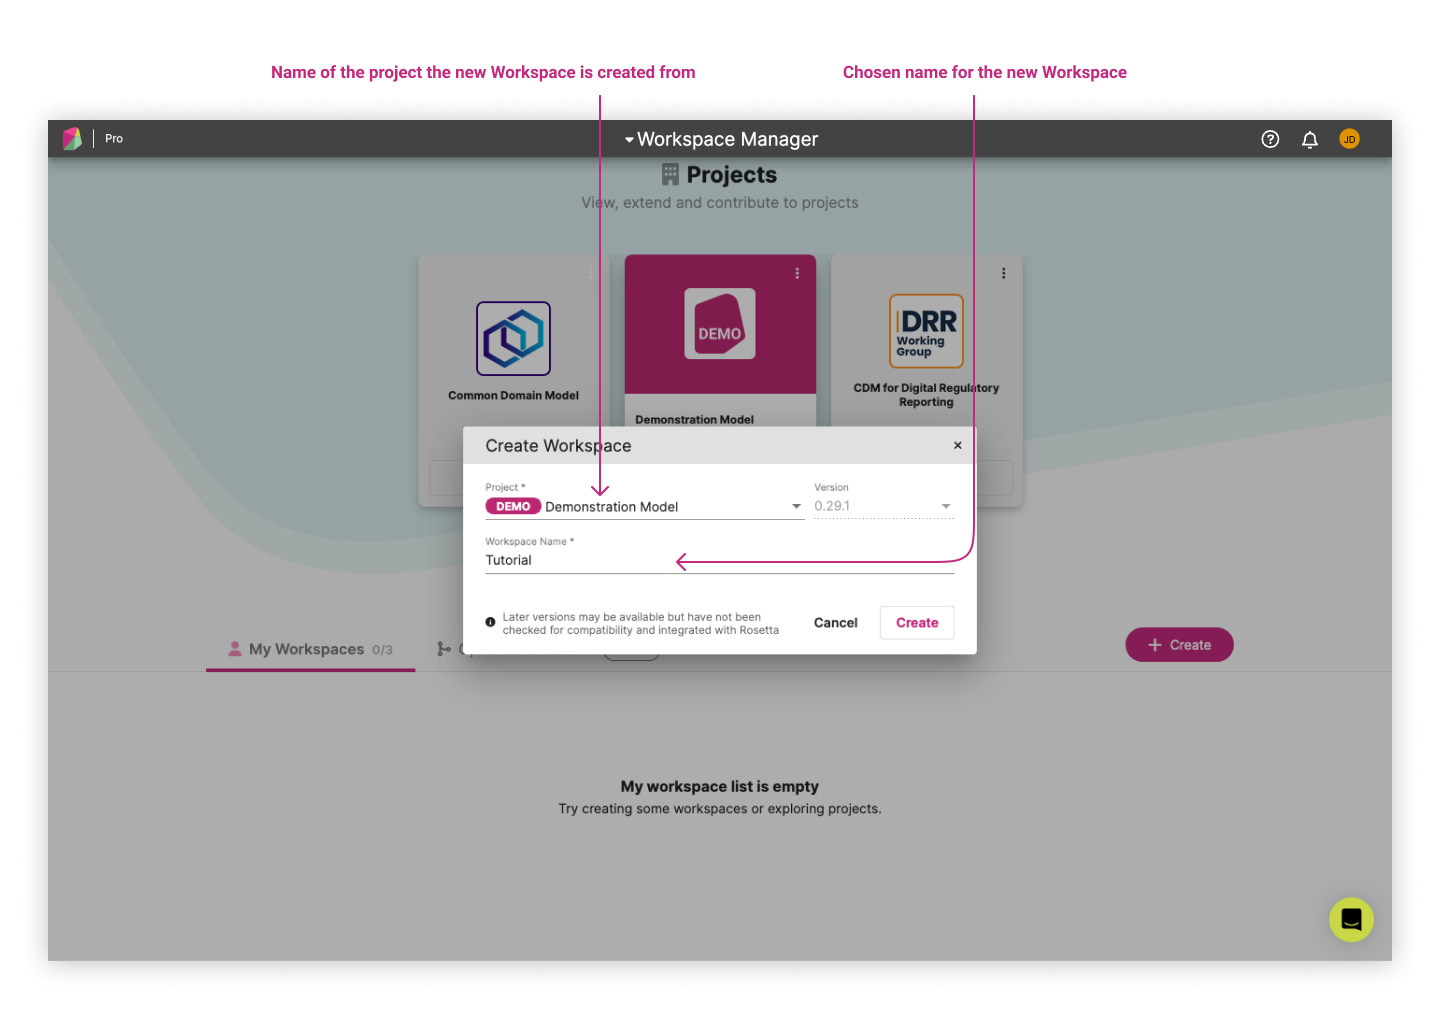
When creating a new Workspace, the user has to choose from a list of Projects. That is, Workspaces do not get created "from scratch": as Rosetta is used to edit, test and potentially contribute back to any chosen models, each Workspace is attached to a specific version of a chosen model.
In the following pop-up window, we create a Workspace called "Tutorial", based on the Demonstration Model as the selected Project, with version 0.3.1, and then we give it the description of "Demonstration Model Tutorial".
Once created, the Application automatically switches to the new Workspace and the user is ready to go.
When creating a new Workspace, the server fetches all required model components from the model source-control repository and copies them into the user's Workspace area (a.k.a. "Checking-Out").
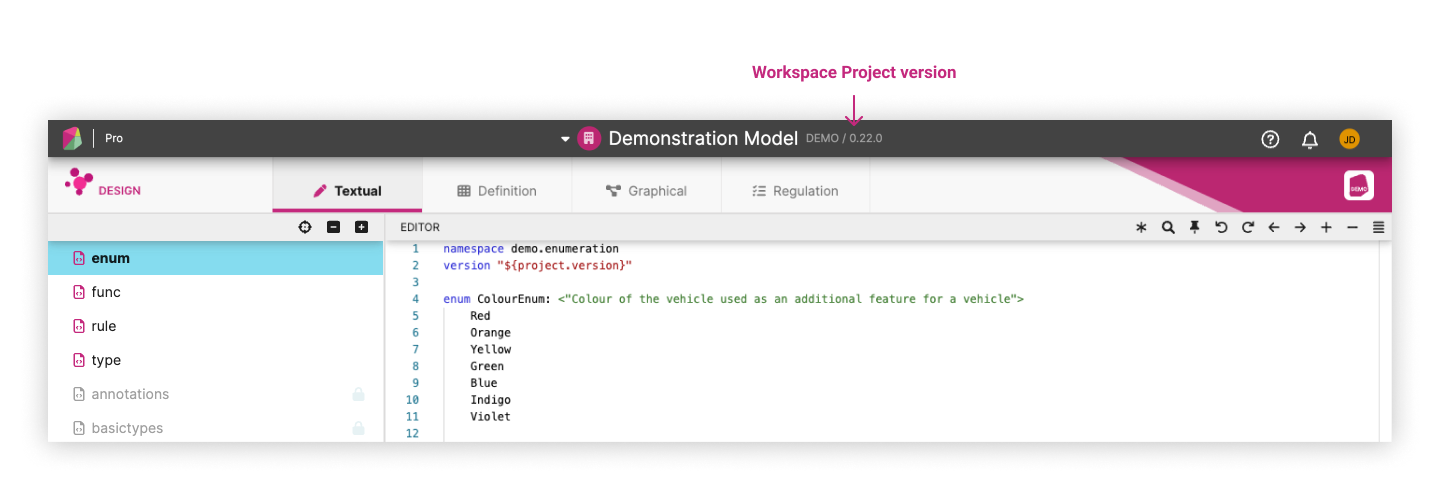
The associated model version is displayed next to the Workspace name at the top of the page
Further details about version management or persistence into the source-control repository are provided in the Source-Control Integration section of the documentation.
Deleting a Workspace 
Once the user is finished with their unit of work associated to a Workspace, they may delete that Workspace so that all the files are cleansed from the server. This operation is irreversible and the files will no longer be accessible once the Workspace has been deleted.
Users are advised to save any work that they would like persisted into a source-control repository (a.k.a. "Commit") before deleting their Workspace.
Deleting a Workspace can be actioned by pressing the bin icon next to that Workspace:
Closing a Workspace 
A Workspace can get closed in a number of ways, voluntarily or involuntarily:
- when the user closes their browser window or tab
- when the user signs out of the application
In the scenario when a new product is released the user is informed of progress via a series of announcement banners.
The first banner warns the user that a new release is imminent:

The second banner informs the user that a new release deployment is in progress:

The third banner informs the user that a new release has been deployed (see below). This message will remain on the screen until acknowledgement is given by clicking the "refresh" link:

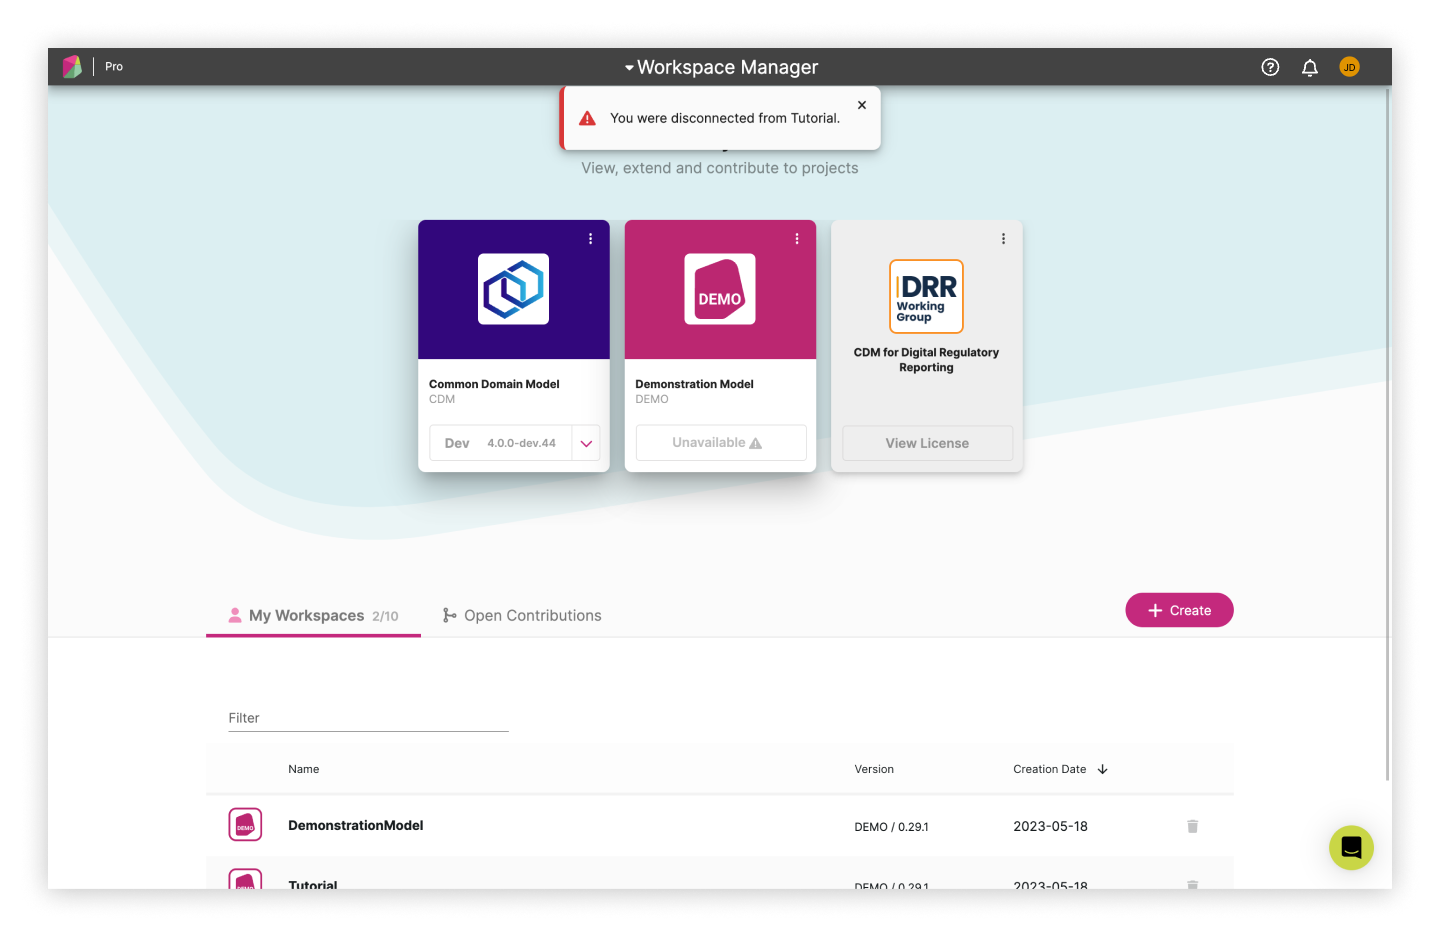
If a user is logged in and becomes disconnected they will find themselves in the workspace manager (shown below). This can happen for a number of reasons but two obvious scenarios are as follows:
- When a new release has occurred.
- When internet connection is lost (e.g. when switching network) the user will again land in the workspace manager.
Source control integration 
A user develops their model in Rosetta as a basis onto which system applications can be built.
In order to integrate their own model output into such system applications, a user must be able to share the content of their Workspace with those systems' source-control repository. There are currently two channels for doing so:
- Directly downloading their Workspace content, to be then uploaded into another system's repository.
- Contributing their changes to the chosen model open-source repository, to be then used as part of another system build.
Open Contributions 
The Open Contributions tab provides users with a comprehensive list of contributions. This feature allows users to conveniently view contributions specific to the models they have access to. By clicking on the contribution row the user will be navigated to the contribution where they will be able to view the changes in a non editable mode. This workspace view will provide the users with features applicable to their tier. Additionally by clicking on the Github action icon on the right of the contribution row, users can effortlessly navigate to the corresponding GitHub Pull Request.
When does a contribution show up on Open Contributions tab? 
Once a user makes a contribution, it will appear in the Open Contributions tab. However, once the contribution has been merged back into the model repository, it will no longer be displayed in the list. It’s important to note that Open Contributions exclusively showcases contributions which have been marked with the Label Rosetta in GitHub. When a contribution is made from Rosetta, the Rosetta label is added automatically to the GitHub Pull request.
Download Workspace 
A user Workspace contains model files, possibly edited, as well as executable code files (classes, libraries etc.) that are auto-generated from the model. A user can download these files from Rosetta using the download feature:
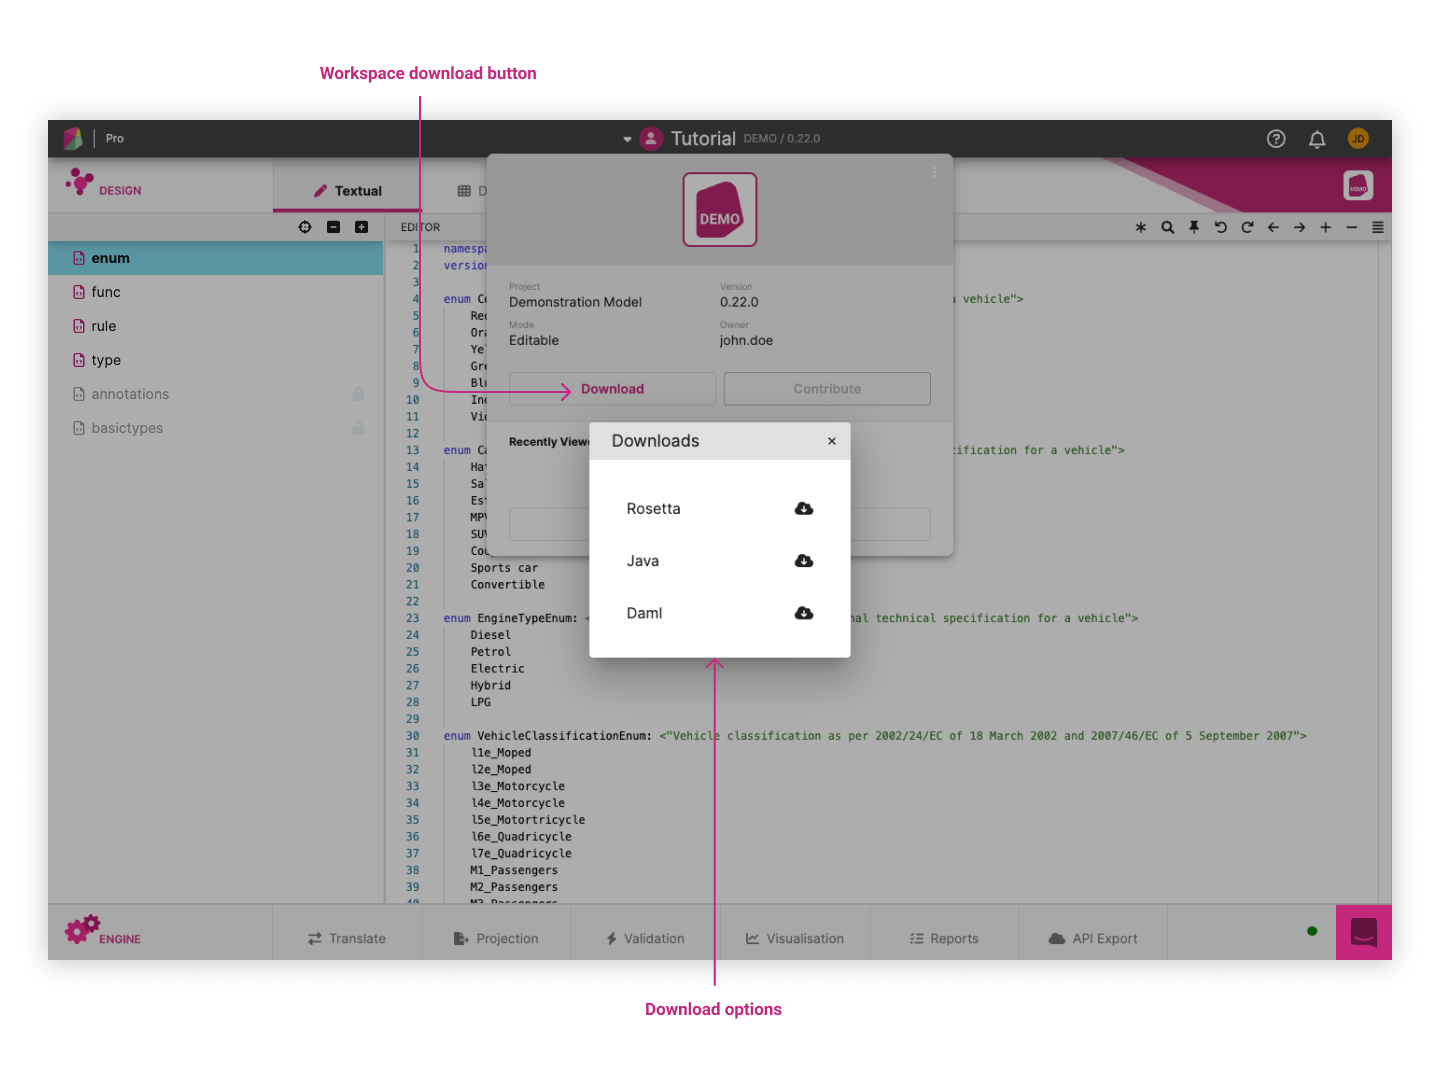
There are currently three download options available:
- Rosetta files: these are the
.rosettasource model files expressed in the Rune DSL syntax - Executable code, currently available in two languages:
- Java: contains the
.javasource files - Daml: contains the
.damlsource files and a.dararchive
- Java: contains the
For more information about automatic code generation in Rosetta, please refer to the Code Generation section of the Rune DSL documentation.
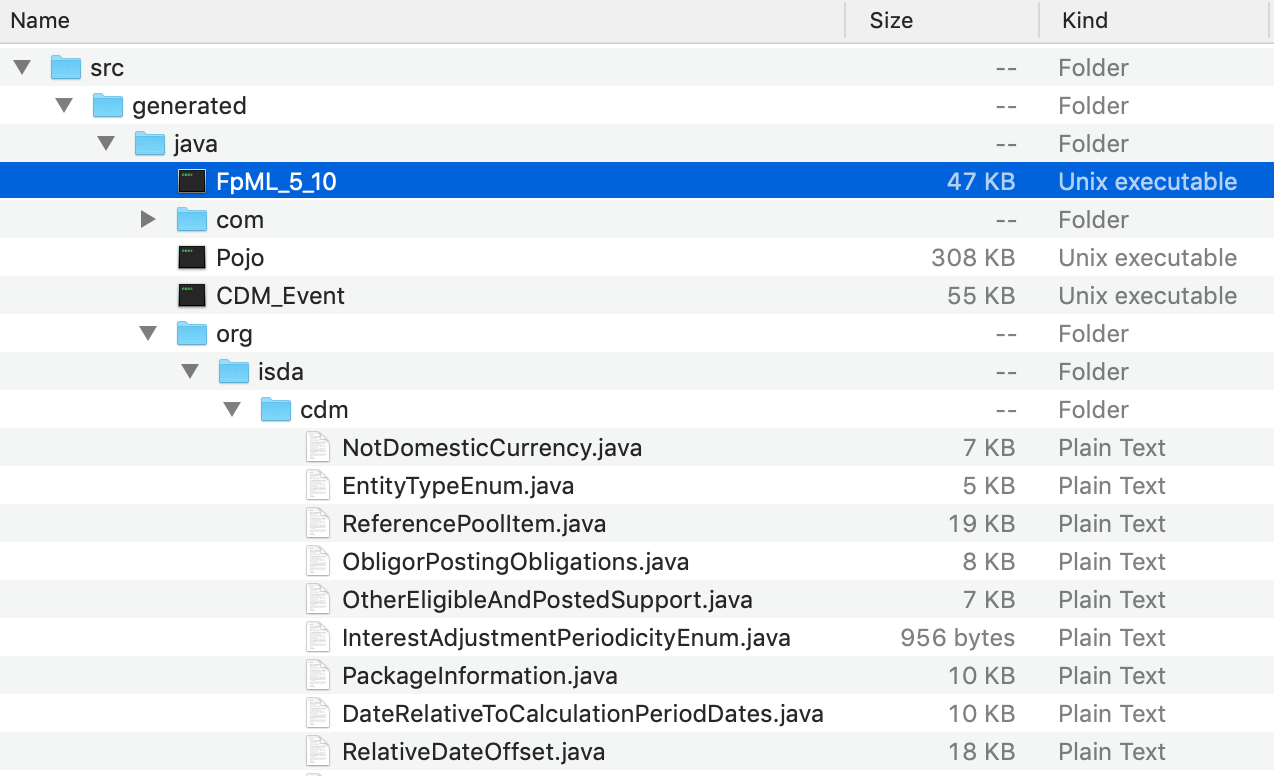
Typically, a user may download the executable code files and use them as part of another system's repository that is using either one of the available languages. The dowloaded files are packaged into a .zip archive and unpacked into a file hierarchy that mimics how such files would be organised in a source-control repository:
Contribute Workspace Changes 
The Rosetta source files themselves in the Workspace may be used to contribute back to the model open-source project. This contribution feature has been fully packaged in Rosetta to directly connect via API to the model source-control repository, so it does not require any Workspace download.
In this Demonstration Model-related example, we are adding a condition to the Create_VehicleOwnership function (a function that builds a record of vehicle ownership), to check that the country of issuance of the driving license corresponds to a specific list of countries:
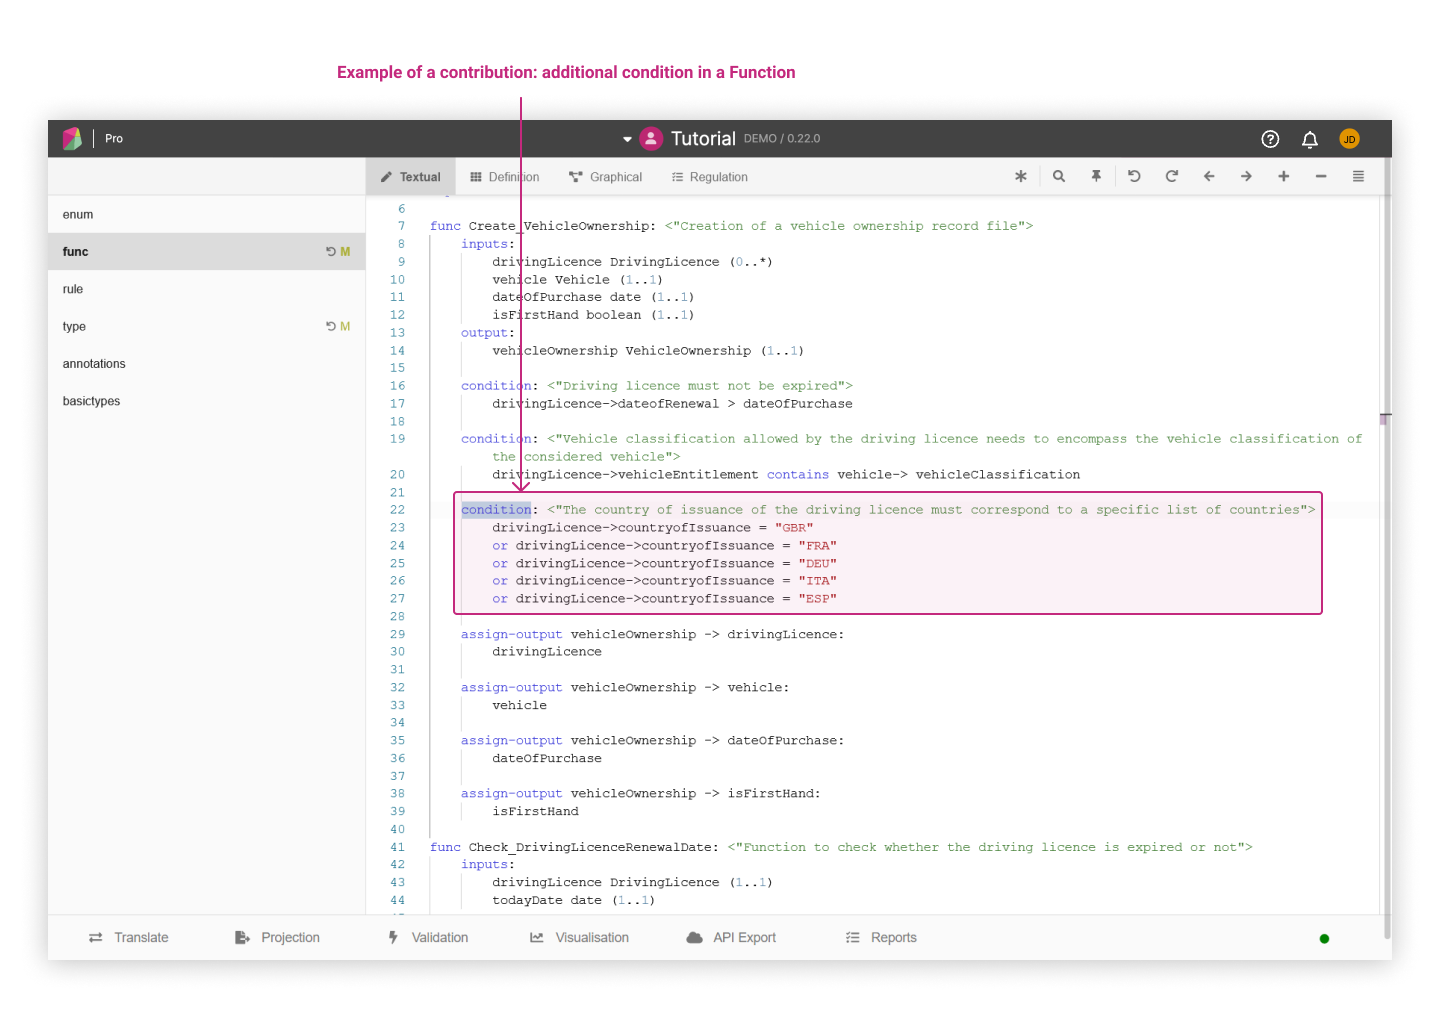
This is a valuable condition to constrain the Create_VehicleOwnership function to determine the scope of jurisdictions compliant with UK Driving Rules and Regulations, so that the user may be interested in contributing this change back to this model. The contribution functionality is accessible via the "Contribute" button next to the "Download" button:

Hitting the Contribute button brings up the Contribute Workspace dialog allowing the user to review their changes. A split-view Modification mode is displayed. The files with changes are displayed on the left hand side. The modifications are displayed on the right hand side:
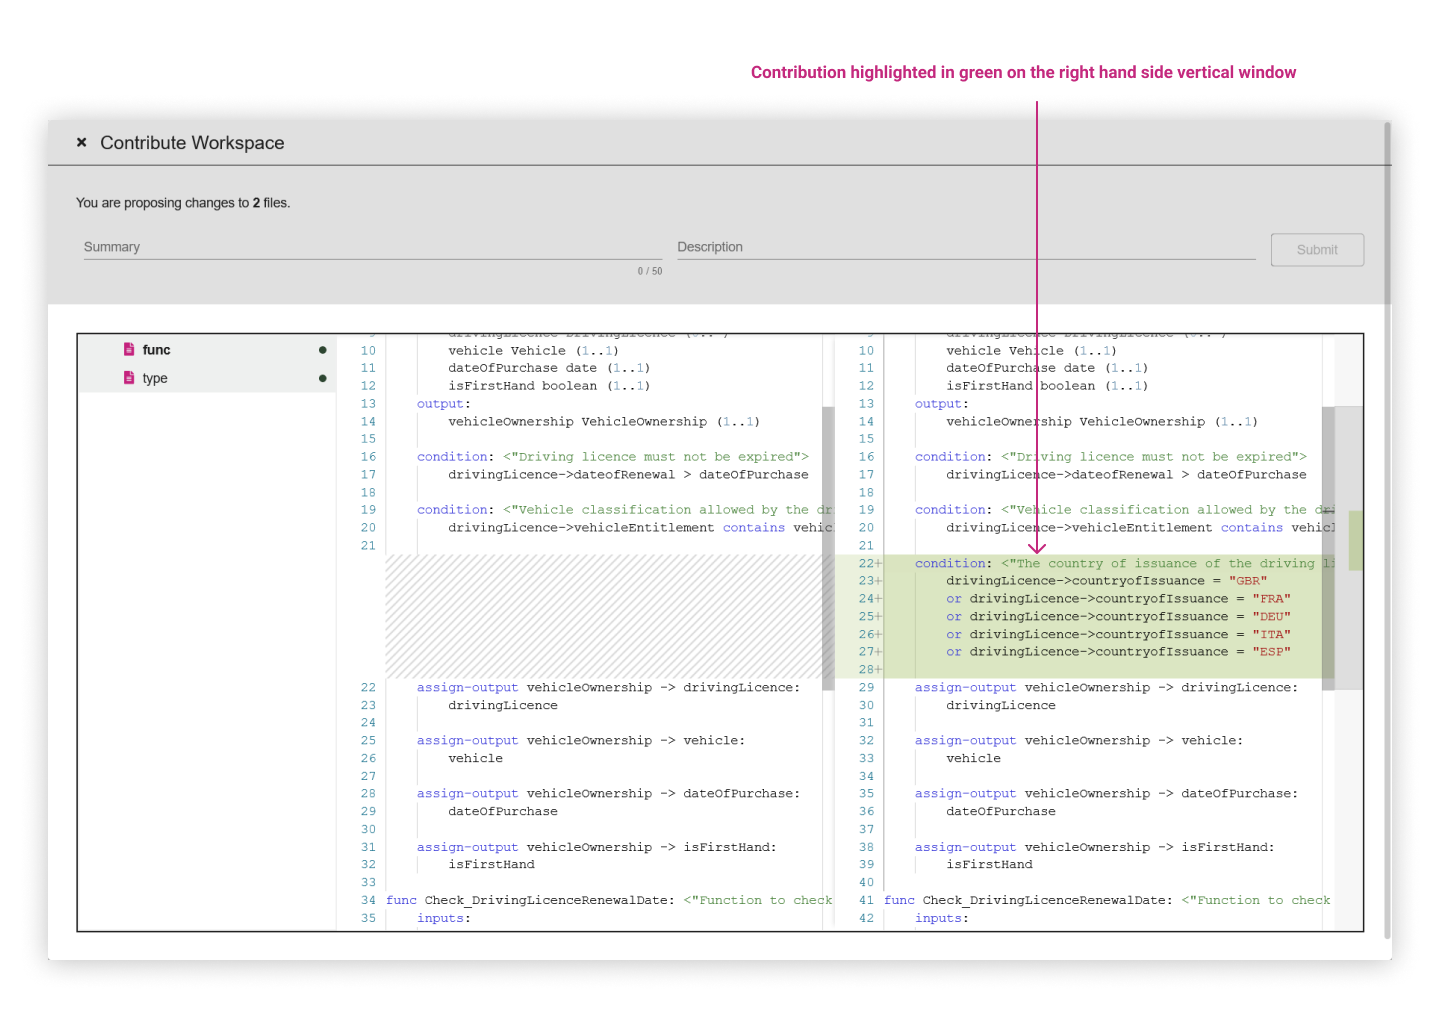
The user needs to provide a Summary (limited in characters) and accompanying Description for their contribution. This indicates the substance of their contribution to reviewers so it should be as concise and precise as possible. The user can then hit the Submit command and the submission gets sent to the source-control API:

Once submitted, the proposed changes will be packaged as a Pull Request in the model repository (in our example: the Demonstration Model), ready for the specific model reviewers to inspect. Note how the request is labelled with the Summary description (as provided above) and also gives the name of the user who submitted it, which helps reviewers identify the provenance of the proposed change.
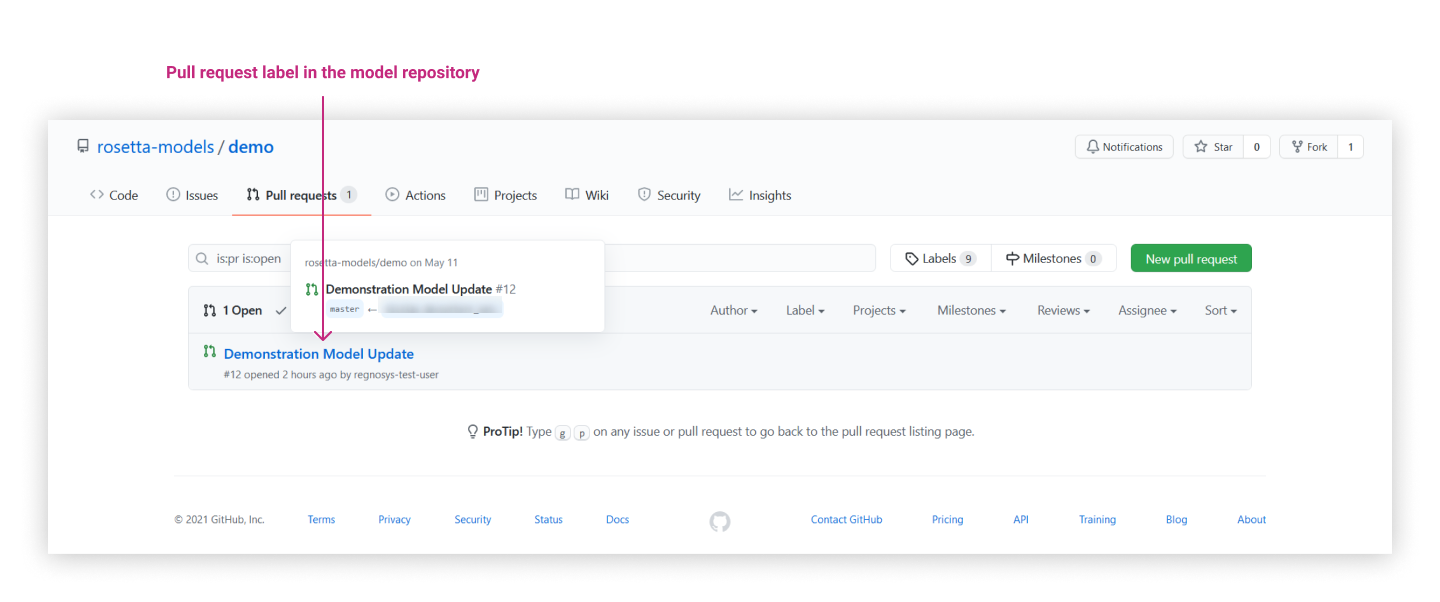
If the contribution is accepted, the reviewer would merge the content back into the model master repository for a potential future release.
Upgrade available) to a more recent version of the model, while preserving their own changes (a.k.a. "Merging"). Conflicts could happen between different versions of the same model, in that case the upgrade functionality would not be available